
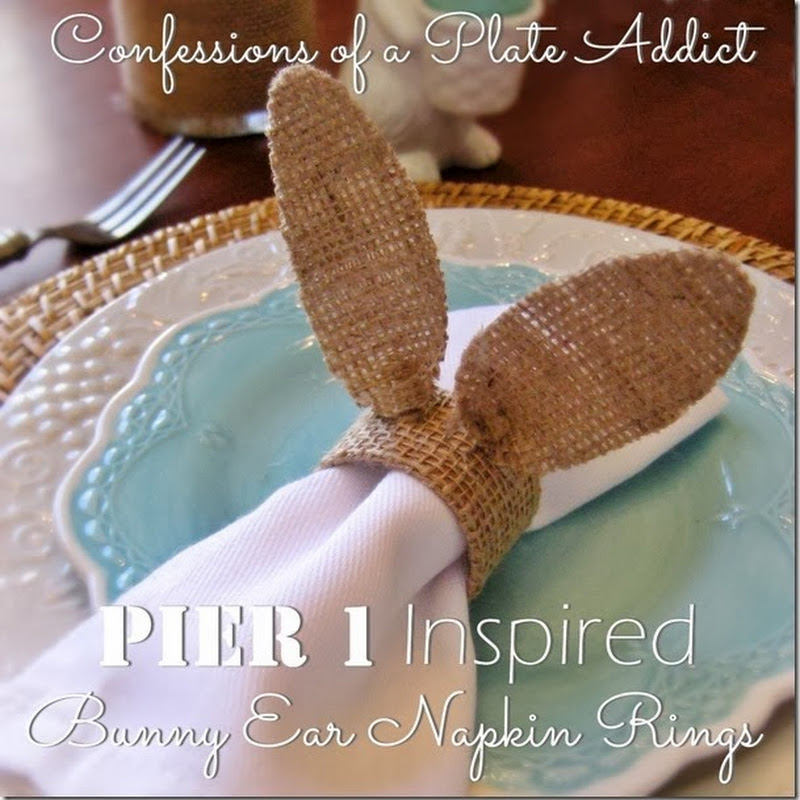
 I can’t wait to share my latest project…my burlap bunny ears napkin ring! Actually, I have my daughter to thank since she was the first one to spot them in Pier 1 and told me that they looked like something I would like to copy …errr… make…and she was right!
 I know spring is just around the corner because, as our CEO Ozzie can tell you, the robins have come back and are gathering on our lawn! Soooo…it’s time to get our spring crafts started!
Here’s what you will need:
- A print-out of the bunny ear pattern above. (Hint: Click on the pattern and it will come up in a new window. Then just hit print and it should be the right size.)
- A cardboard tube from a roll of paper towels
- Scraps of burlap
- Mod Podge
- Heat n Bond or a similar product
- Glue gun
- Scissors
- Clip

And here’s what you will do:
1. Cut a slit the length of the paper towel roll.
2. Measure off one inch increments.
3. Cut the one inch pieces.
4. Cut a strip of burlap 2 1/2 inches wide by 6 inches long.

5. Fold in one end of the strip approximately 1/2 inch and press.
6. Fold the two long sides in so that they overlap to create a strip that is now one inch wide and press. Slip in one of the cardboard strips, making sure that the end of the cardboard tucks under the folded portion at the end of the burlap strip. The other end will remain unfinished. (Don’t worry…it won’t show!)
7. Cover the interior portion of the burlap strip with a generous amount of Mod Podge. Using a hair dryer, dry the Mod Podge a bit, then press and smooth the ends together with your fingers. Let it dry completely, preferably overnight.
8. In the meantime, you can create the “ears.” Start by cutting a piece of burlap that will be just large enough for cutting your ears. If you are making multiple napkin rings, you will, of course, cut more ears. Then cut another piece of burlap and a piece of Heat n Bond the same size as the first piece of burlap. Follow the directions on the package and fuse the two pieces of burlap together.
 9. Using the bunny ear pattern above, cut as many ears as you will need…two per napkin ring, of course. :-)
10. The burlap is now thicker and will hold its shape and resist raveling.
11. Add a small bead of hot glue and pinch the bottom portion of the ear together, holding it in place with a clip while it cools. (I used a clip from a coat hanger.) Be careful not to touch the hot glue so you don’t get burned! Ouch!
12. Run a small strip of hot glue along the top side of the unfinished end of the napkin ring end. Place the finished end over it and press down, holding in place with a clip until it cools. (Hint: I use a bamboo skewer when I need to press on any surface where I am using hot glue so that I don’t touch it and get burned.)
 Now you are ready to place the ears on the napkin ring. Simply hot glue them in place with a small bead of glue, once again pressing down with a bamboo skewer so that you don’t get burned.
  Now just add a pretty napkin and…taaa daaa…you have a cute springy napkin ring ready for your table! And the best part…they were free since I made everything from scraps! Gotta love free! And hold on to your bunny ear pattern because I will have another fun springy bunny craft for you...

 And just in case you missed them, here’s another fun burlap-y spring copy-cat project…my Pottery Barn inspired burlap wrapped vases. They are super easy and inexpensive to make!
 Here’s another way to display spring flowers that also makes an easy and inexpensive gift…my chalkboard flower pots. Just add the expression that you need in chalk!
Thanks for stopping by! I hope you enjoyed seeing my Pier 1 inspired burlap bunny ear napkin rings! Please visit these wonderful bloggers and their beautiful blogs to see what they are up to and to find a list of this week’s participants!
Under the Table and Dreaming for the Sunday Showcase Party, Thrifty Decor Chick for Before and After Monday, Between Naps on the Porch for Metamorphosis Monday , The Stories of A2Z for Tutorials and Tips Tuesday , Coastal Charm for Nifty Thrifty Tuesday , A Stroll thru Life for Inspire Me Tuesday , My Uncommon Slice of Suburbia for Tuesday's Treasures, Savvy Southern Style for Wow Us Wednesdays , The Shabby Creek Cottage for Transformation Thursdays , No Minimalist Here for the Open House Party on Thursdays, French Country Cottage for Feathered Nest Friday , Common Ground for Be Inspired on Fridays , The Charm of Home for Home Sweet Home Friday , Craftberry Bush for the Inspiration Gallery on Friday, Creative Juice for the Easter Ideas Link Party
See you next time! À la prochaine!
Also find me at…


No comments:
Post a Comment